
 Soil health is essential for any successful garden or landscape. As we touched on in previous installments in this series, the microorganisms in the soil are in effect the unseen stewards or caretakers of the soil. Without these tiny soil workers, the available nutrients never make it to plant roots and hence, soil & plant health can decline.
The leading reason for deteriorating organic life is the absence of organic material in the soil. Years of over feeding soil with harsh chemical fertilizers, such as are common in conventional turf-lawn maintenance, will eventually over saturate and effectively render the soil lifeless. Lifeless soil produces poor results with any plant, despite claims that California native plants prefer, shall we say "poor" soil. In fact all plants like well draining soil with some available nutrients.
Another factor to consider when dealing with soil preparation for areas intended for new plantings; most nursery propagated plants are grown in perfectly textured, well draining soil with a slight preference for the sandy-loamy.
Sustainability on the Ground: A Question of Accessible Values
In addition to living organically or "veganically" (meaning no animal byproducts; manure, bone meal) , some people are also seeking ways in which to minimize their overall wastage or carbon footprint in general. In this article we will be focusing on soil building (not surprising) which as it turns out, is one of the single most important "at home, in the available landscape you already have" practices which, along with regular weeding, rounds out the foundational or core aspects of any functioning organic garden and solves for many kinds of unseen resource wastage.
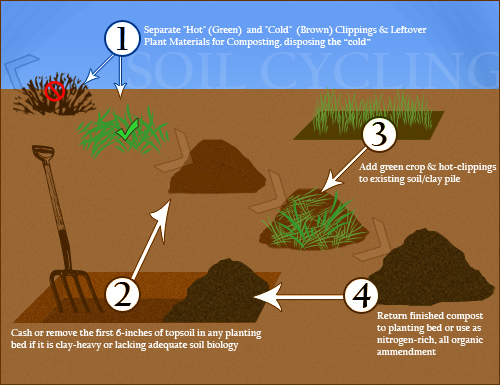
Creating Soil: Composting, Green-Cropping & Soil Building
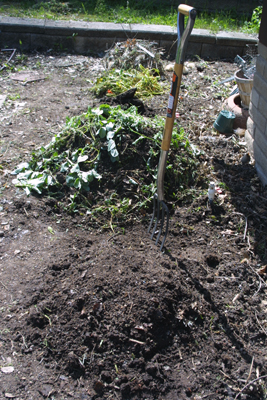
Compost needs full sunlight, periodic watering and turning for aeration to decompose completely and correctly without creating mold. Some prefer, due to the unsightly aesthetic appeal of large mounds of what look to be scraps (they are!), to simply dig a series of pits in which to stage each respective pile. While this is certainly a handy way to control the organic compost you will be making, it also adds additional labor to the already constant task as well as giving rise to the potential for fungal residue due to water which can collect & remain in the pits, so we prefer to simply leave the compost mounds above ground and in the open light.
Green Crops: The Life of the Party
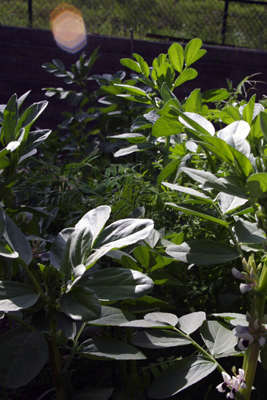
 To add a source of needed nitrogen, we like to set aside some portion of the garden to grow what are called "green" or nitrogen-rich cover crops. These are very simple to grow and are sown by seed and raked in just below the soil surface. The seeds are left alone during the winter months to establish by the rains. Some common plants used in green crop seed mixes are: wheat, vetch, rye, and fava beans.
Growing green cover crops has a variety of benefits in the organic garden including the ready provision of nitrogen-rich plant material but more, the plants themselves fix nutrients at the root level, which means that even after cropping the topical plant materials, the soil is left fresh and ready for turning or replanting as the bed is now rich with fixed nitrogen the plants can readily use.
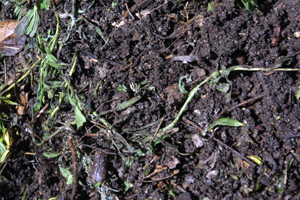
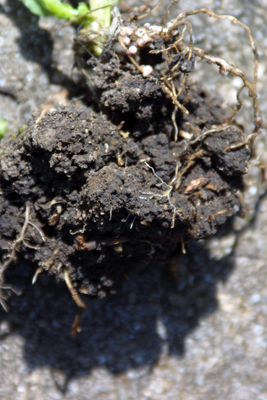 |  |
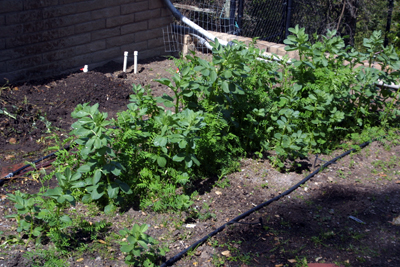
Looking at the above photo on the left, we see that the green crops are purchasing the soil to a fairly good root depth, which means that the plants are, through the rooting actions, breaking up and aerating the soil. As we magnify and rotate a detail shot of the actual root base we can clearly see the fixed nitrogen nodules now collected just below the soil surface at the root level of the plants. When mature, the topical green-crop plant material gets cut down to the surface and added back to the lifeless clay or old soil, while the now nitrogen rich roots and soil in the original green crop bed can be turned and replanted or cashed as additional amendment.
Starting the Organic Engine: Make Haste Slowly
To begin this cycle you will first need an adequate amount of compost to make the "exchange" - so begin saving all your cuttings! We start this cycle by removing the top six inches of any given planting bed if said bed is heavy clay or simply lifeless (meaning no micro-organic activity) and with this, make a small pile. Add to this pile of clay or old soil the plant-clippings and existing organic green-crop compost at a 50:25/25% ratio, meaning 50% old material, 50% new material, if possible. This pile of 50% old material and 50% new organic material will need to rest for anywhere between three weeks to two months depending on the climate and materials added to the piles. When this has been mixed and turned several times, it is moved aside to age or decompose completely. This becomes our on-site, nitrogen rich all organic compost.
The mounds are separated and spaced apart
Brown or "Cold" Material Pile: Back in Black
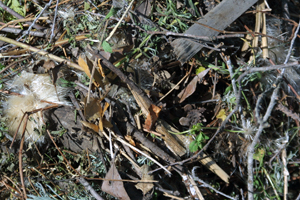 This pile is actually the first to be made and separated from the rest, as it consists of all the materials to be sorted out which are unsuitable for use in an organic compost pile for a variety of reasons.
The density of wood helps it resist rapid decomposition, which is so necessary for good organic compost. Also, brown or hard material as it decomposes adds, by percentage, more carbon than nitrogen, which is why it is often labeled "cold".
Some of the materials we avoid adding to our compost piles are hardwoods or any cutting in excess of 3/4 inch as these generally take too long to decompose and really only add carbon or 'cold' value.
Green or "Hot" Material Pile: What Thrived Once, Lives Again
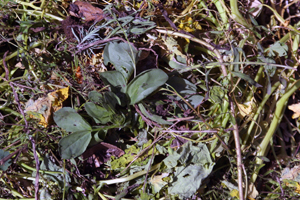
Green materials consist of almost any plant or leaf material from almost any source. In most gardens, due to regular plant cycling & mortality, there is typically ample available material with which to start a green or "hot" materials cutting pile. Again, it is important to sift the green cutting well for rogue branches and overly-stout stems. Avoid adding any processed (human) foods as sugars tend to attract flies and animals. Stick to bright green vegetable and plant material in general and your compost should be pest free.
Existing Soil or Clay Pile: We've Only Just Begun
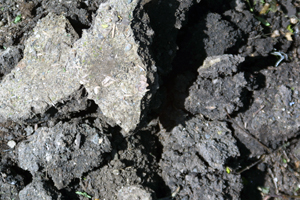
This is a pile of soil or clay which was extracted from existing beds, older plantings and through soil cycling. Soil cycling is a method of exchanging poor soil with nutrient rich amended soil which is made on site, then returning the upgraded soil back to an existing bed. If cycled judiciously, most gardens can be completely rebuilt in a couple seasons without any store bought fertilizers.
Mixed Pile of Clay & Hot or Green Clippings: Speaking Words of Wisdom, Let It Be
 This is the amended soil, now 50% old matter and 50% new to which we added the fully grown and harvested green crops. This pile will need to be watered and turned frequently for 2-3 weeks, depending on climate and composition.
This is the amended soil, now 50% old matter and 50% new to which we added the fully grown and harvested green crops. This pile will need to be watered and turned frequently for 2-3 weeks, depending on climate and composition.
Rebuilding the soil balances the garden or landscape ecosystem from within its own boundaries. Starting with extremely clay-heavy soil, we have been able to produce friable, well draining soil full of life and nutrients.
Finished Organic Compost: Gardeners Black Gold
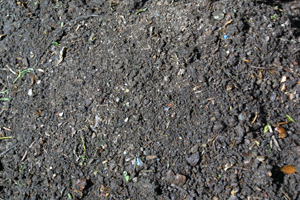
Once the material has broken back down into essential components it will resemble normal soil, will look rich & black (almost like spent coffee grounds) and should already be showing signs of attracting beneficial insect & other life. Return this soil directly back into a previously cached bed or use liberally as a top dressing for existing beds & plantings.
Creating a self-sustaining system of returns is a huge undertaking for any gardener. The very idea of creating a "sustainable" garden implies quite a bit of planning followed by the certain promise of labor. With foresight and some good 'ole elbow-grease, virtually any garden can be transformed from within its own borders. Old soil can be brought to life, balance can be established organically, if we only identify and engage with the existing natural machines which are already functioning around us.
Questions
Some general considerations when it comes time to restock on soil for the garden or landscape:
1) How much energy does it take to get the soil to my location?
Have you ever stopped to wonder how many gallons of fuel and how many man-hours of labor it takes to produce one bag of store bought "organic" compost? The reality and associated costs may be surprising. By creating the needed nitrogen sources and by rebuilding soil on-site, we can effectively liberate our gardens and landscapes from the petroleum and energy intensive chain of driving to purchase soil which had to be delivered to the supplier in a large truck in the first place.
2) Where do all my leaves go?
2) Where do all my leaves go?
Another interesting factor to consider is the use of our collective space. There is a great deal of transportation and storage at the civic level dedicated to organizing and off-loading the endless masses of leaves, twigs, grass clipping and other cast-off plant materials emanating from the urban landscape. If we can reuse and revitalize a significant portion of our plants, we can avoid participation in endless energy burning cycles, which helps to ease the strain on public landfills.
3) Where is the organic compost from?
In many cases large rockeries and landscape material suppliers are reselling "organic amendment" which is sourced at the local landfill, which includes the local grass clippings and all the various chemicals used in routine lawn maintenance. Unless you are creating your own soil, either you are extremely well informed or you are not really that concerned at the contents of the soil. Often, we have found that two different suppliers were reselling city compost which was simply retreated.
Saving energy, increasing efficiency while ensuring health for the garden and yourself, is a great way to engage in home grown sustainability. It's a great workout, too.
See more in our Living with Low Water Plants series:
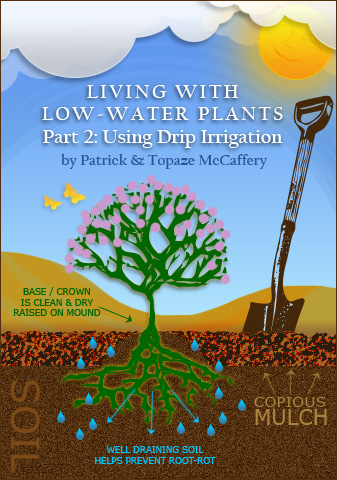
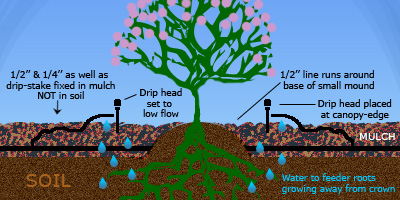
Part 1: Plant Installation Part 2: Using Drip Irrigation
Part 5: Holistic Economics


